| Goat Up 2 page ( soon to be updated ) |
| Part 1: Selecting a level to edit Part 2: Editing a level Part 3: Tile and Object Reference Part 4: Tips for Designing Fun Levels |
Editing a level
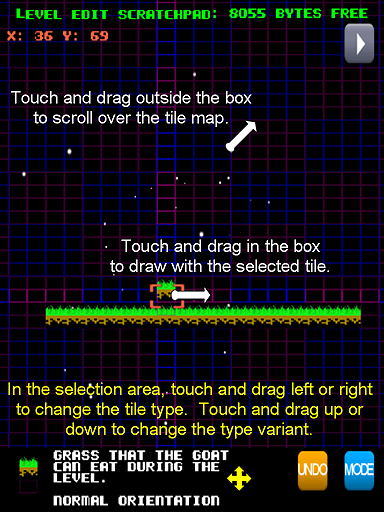
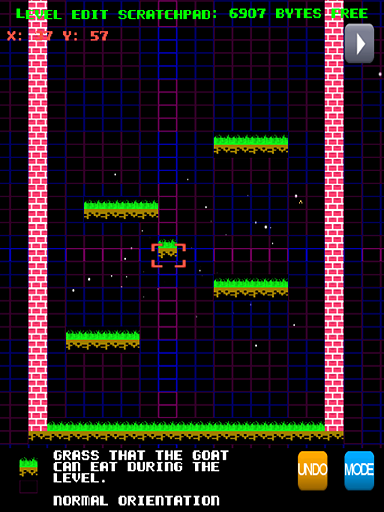
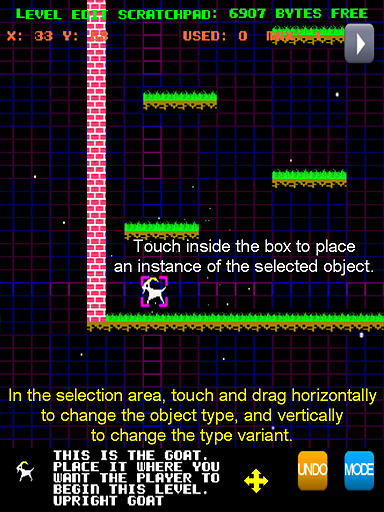
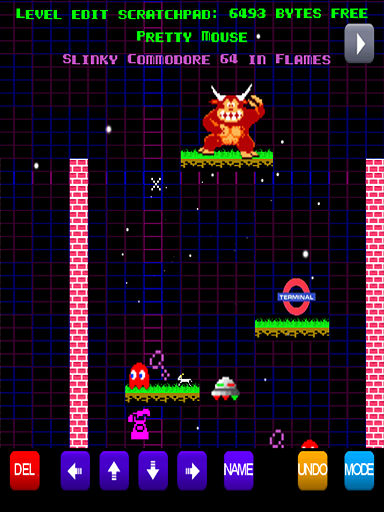
The Level Editing screen The main screen area containing the tile map fills most of the screen. The strip at the bottom of the screen is called the Selection Area, and it is where you choose editing modes and items to place in the level. There are four different modes the editor can be in. Usually when you enter the editor for the first time it will be in Tile Mode, as illustrated here. Tile Mode is used to make the platforms, walls, floors and other such generally static structures within your level. Pressing the MODE button in the right of the Selection Area cycles through each of the four modes. When you make an edit, the UNDO button appears. You can UNDO up to the last 8 editing actions. Editing in Tile ModeIn Tile Mode, the currently selected tile is shown in the left side of the Selection Area, along with a brief description. Touching within the Selection Area and dragging horizontally will cycle through all the available Tile Types. Touching within the Selection Area and dragging vertically will cycle through all available Variants of the current Tile Type. To add tiles to the level, you use the Tile Cursor on the main screen. This appears as a little box cursor with a copy of the currently selected tile in it. To move the cursor, touch and drag anywhere on the main screen outside of the cursor box. This will move the cursor and scroll over the entire level tilemap. To add a single tile, touch inside the Tile Cursor on the main screen. To add a row of tiles, touch inside the Tile Cursor, and draw a line of tiles.
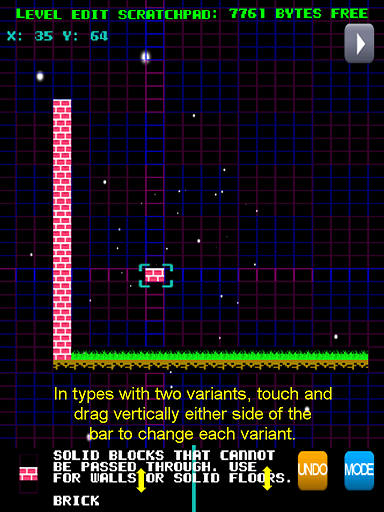
Tile Type Variants
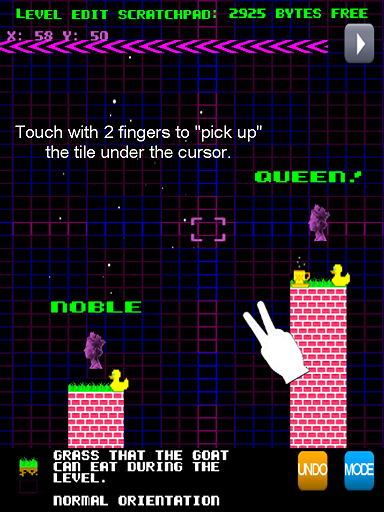
Picking Up a Tile
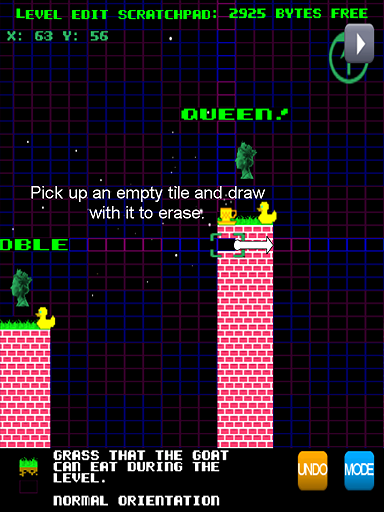
Erasing Tiles
Drawing Some Platforms Editing in Object Mode
Object Mode cursor
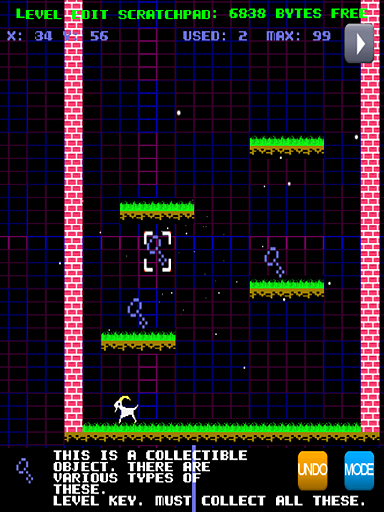
Placing Level Keys
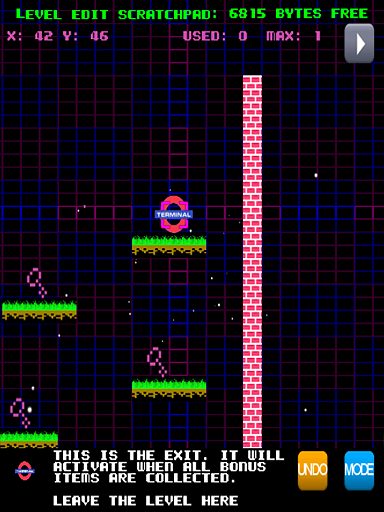
Placing the Exit At this point you have a complete, if extremely simple, level. It has a goat, it has some Level Keys to collect, and an Exit that will open as soon as all the Keys are collected. You can press the Play button at any time to test how a level is working out.
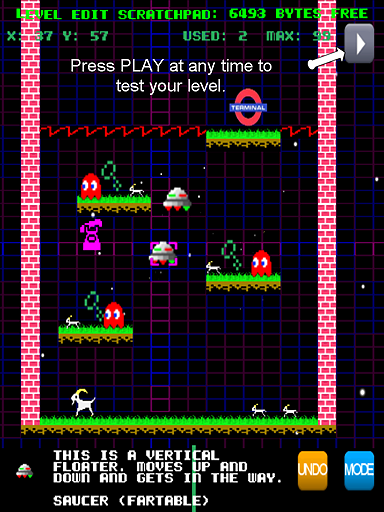
A small but busy level Deleting and Moving Objects
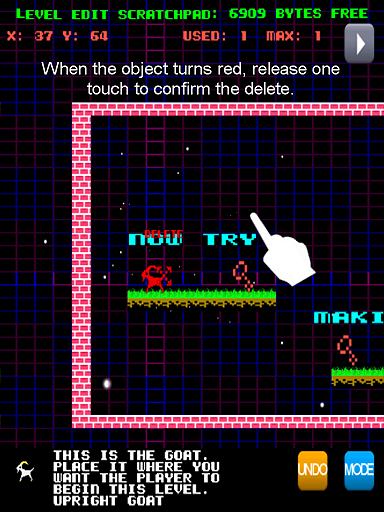
Object Mode Delete cursor
Deleting an Object
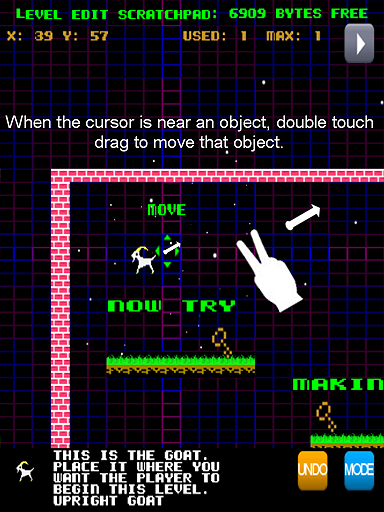
Moving an Object Other Edit ModesThe remaining two modes are very simple - Back Mode and Modification Mode.
Back Mode
Modification Mode The DEL button completely deletes the level. Use this when you want to begin a completely new level. And don't worry if you press it by accident, since you can always UNDO. The arrow buttons shift the entire level one tile in the direction indicated. This can be useful if you are designing a level and find that you're "running off the edge of the page" on one side or other. You can shift the level over to make room. The NAME button activates the Nomen-Clo-Matic level namer. Keep pressing it until you get a level name you like. That's the basics of how the level editor works! I'll provide a reference for the various tile and object types, but the best way to learn about these things is to use them. I recommend you play the set of default levels called "Awkward Star". This begins with very simple levels, and then introduces variants on a standard level template design that show off the various object and tile types, and how they affect the gameplay. Then start playing with the editor. Use it interactively, testing how it feels as you build a level, pressing PLAY frequently to try things out. Read my hints about making good levels that are fun to play. If you make some really great levels, consider sending them to us, we will collect together some of the best and make them available! The most important thing is simply to have fun and let your inner Matthew Smith speak!
|
| Part 1: Selecting a level to edit Part 2: Editing a level Part 3: Tile and Object Reference Part 4: Tips for Designing Fun Levels |
 |
 |
 |
 |
 |
 |
 |
 |
 |
 |
 |


|
||||||||||
| Take me home |
Goat Up 2 - manual page 2